Do you care about the appearance of your home? Would you also like to enjoy energy efficiency and lower heating and cooling costs? If so, you may be interested in learning more about Marvin and the process of installing them…
Marvin: Built for Life
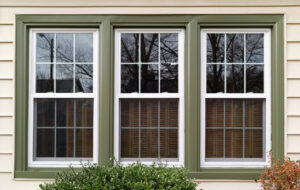
Marvin windows are renowned for their style, durable quality, and smart craftsmanship. The company was founded over 100 years ago as a family-owned and operated lumber operation. Today, they offer more than 150,000 custom window options. And, all Marvin Windows are ENERGY STAR certified. This means they meet strict energy performance standards set by the EPA. To be ENERGY STAR certified, they also are independently tested, certified, and verified by the National Fenestration Rating Council. In addition, the Better Business Bureau gives Marvin Windows their highest score of A+.
Installation
What’s the process for Marvin Window installation like? Thankfully, Marvin Window installation is simple. They can be double hung, single hung, and everything in between. These windows are even available as decorative casement windows, corner windows, and all kinds of specialty shapes.
If you’re interested in sprucing up your home or even doing some DIY remodeling, you could give Marvin Window installation a try. Whether you’re replacing an existing frame or adding to new construction, follow these steps for your installation.
Measure the Opening
The first step is to measure the opening. Measure the window you’re replacing, or the empty space to be filled. Be sure to take the time to get exact numbers. Measure inside the existing frame at the top width, bottom, and middle. A good rule of thumb is to use a window ¾ of an inch smaller than your window frame to avoid having to reframe.
Remove Window
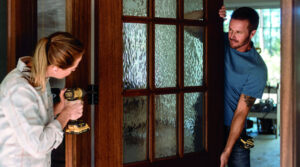
The second step in Marvin Window installation is to remove the existing window. Be aware of jagged edges during this part of the process. You may want to use painters tape to cover any cracks. This can help prevent shattering.
Prep and Dry Fit
Prepare your frame for installation. Check to see that the window fits and the edges are smooth. Also, make sure the new window is level and evenly placed. Once the replacement window is set into place, caulk around the molding.
Set and Level the Window
Once the window is in place, make sure that it’s level. This part of the installation is crucial. You may want to use a carpenter’s level to make sure that the window is standing straight. Adjust as necessary.
Pre-Drill and Apply Caulk
This part of the Marvin window installation involves drilling holes into the framing. To make sure that the window is square, measure both diagonals. If they are the same, your window is set properly. Once it’s set in place, apply caulk around the edges.
Secure and Insulate
Install screws in any place where there are drilled holes. Once this is done, the window should be secure. Your Marvin Window installation is almost complete! After this, add insulation between the window jamb and the framing component.
Paint and Complete
The final step is the most fun part of the installation. Pick a fun color that you love and go to town!
Of course, these are abbreviated steps for window installation. If you’d like to relax and leave the job to the pros, contact us at Open & Shut. We can make your Marvin Window dreams come true.